Sign up for restaurant insights
Interested in expanding your business’s takeout and delivery strategy by partnering with Grubhub? Now you can set up your Grubhub account and start taking orders with just a few steps. Dig into how you can self-activate your Grubhub account in this guide.
What is Grubhub self-activation?
Self-activation is a process that allows merchants to go-live on Grubhub with minimal assistance. By following Grubhub’s self-activation steps, a merchant can list their business on Grubhub and start taking orders.
How to self-activate your Grubhub account
Ready to start receiving orders on Grubhub? Follow these steps to activate your account:
1. Open your Grubhub activation email
After signing up for Grubhub you will receive an email with instructions on how to launch your store. Click on “log into Grubhub for Restaurants” and enter your admin email as your username. Click “Reset your password” to set up a password for this account.
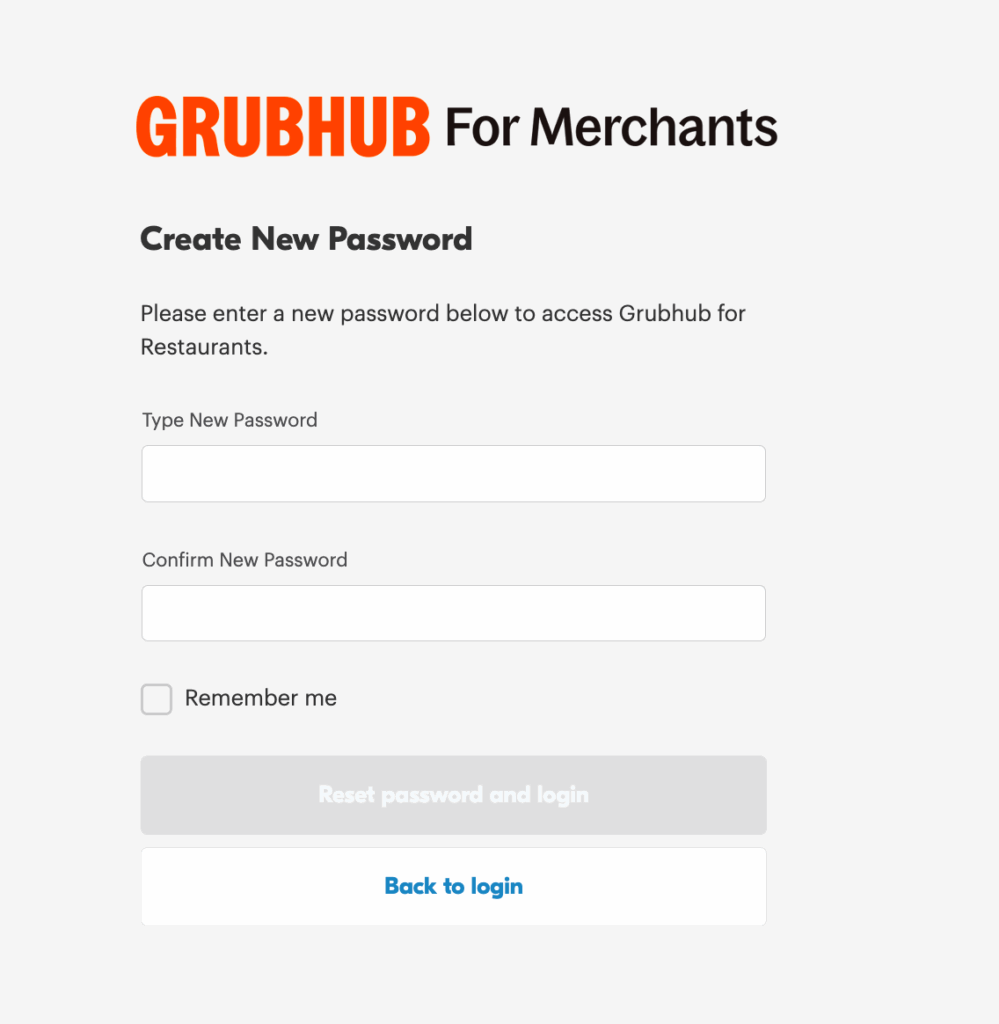
2. Create an Admin password
When you click “Reset your password,” you will be directed to a page to create a new password. Confirm your new password to log into your Admin account on Grubhub for Restaurants.
3. Navigate to “Get started” page
Once you are logged into your Admin Grubhub account, click “Get started” on the lefthand menu. You will be directed to a page with step-by-step instructions on how to onboard your business. You can either begin your Grubhub activation immediately or assign the activation task to someone else within your organization.
If you want to assign someone else within your organization to complete the activation, click “Add another user to activate.” This new user will receive a separate email login and have the ability to set up Direct Deposit.
4. Complete payment setup
Click “Set up payment” to complete your payment information. You will be directed to complete a W-9 form, connect your bank and establish payment frequency. When you finish adding your payment information, the “Set up payment” task will be marked as complete. Click here for more information on setting up payment.
5. Upload storefront photos
Add images to your Grubhub storefront and menu by clicking on “Upload storefront photos.” Click on the pencil icon throughout the page to add your own food photography. Click here for more information on uploading photos to your Grubhub storefront.
6. Add or review hours
Click “Add or review your hours” to finalize the operating hours for your Grubhub storefront. Click the pencil icon on the top right corner to adjust the hours you will be operating for each day of the week. Confirm your hours by clicking “save” before navigating back to the setup page.
7. Connect with onboarding specialist
Once you complete your payment, photo, and hours setup, an Onboarding Specialist will reach out to you to make sure you completed the onboarding successfully. This specialist can answer any questions you may have, and you can reach out to them directly by using the contact information on the bottom right area of the setup page.
8. Track menu, tablet, and integration status
The “Get started” page is your go-to place to see the status of your self-activation. Scroll down to see the delivery status of your Grubhub tablet and get its tracking number. You can also view your Grubhub menu status. Each merchant’s menu is built by our menu team, which can typically take up to 2-3 days to complete. You will receive an email and text message once your menu is finalized and your tablet arrives.
You can also view the status of your POS integration with your Grubhub menu. Click “See activation instructions” to get more information on the specific action steps needed to integrate with your preferred POS system. You will receive an email and text message once your Grubhub POS integration is complete and ready for a test order.
Checkpoint: Before you’re ready to test orders, make sure you have completed the following steps:
- Set up your payment
- Upload storefront photos
- Set up your Grubhub tablet
- Finalize your POS integration
If you have any issues with completing these steps, reach out to your Onboarding Specialist.
9. Send a test order
Check the functionality of your Grubhub setup by issuing a test order. Navigate to the “Get started” page and click “Send a test order.”
Follow the steps to send a test order to your business. You can review your test order in the “Orders” section of your Grubhub dashboard. Click “confirm” to complete the test order. If this process is successful, you are ready to receive real orders. You will then receive an email and text message with a link to complete your Grubhub activation.
10. Go live
Once your test order is successful, click “Go live” on the “Get started” page to launch your Grubhub storefront. A pop-up window will give you the option to start taking orders right away, or schedule a launch date in the future. After you schedule a launch date you can edit and reschedule through your Grubhub for Restaurants Admin account.
Questions? Log into your Grubhub for Restaurants account to contact our team of specialists today.